

1. REMOVE THE PART(S) FROM THE PACKAGING
Our parts are carefully packaged by hand and are in either a selection of different sized cardboard boxes or a small sturdy tub with clear lid. The parts are stuck to the bottom of the box or tub using Micro Glue Dots, then loose cotton wool is placed around the objects just in case the items comes loose during shipping.
After opening the box or tub the cotton wool will need to be removed carefully with tweezers. Once the cotton wool is removed the part(s) will then be free to take out. Because the parts are stuck to the box with a glue dot, then we suggest using a pair of good tweezers to remove them, they should become free quite easily.
All the boxes and packaging are recyclable or compostable, be sure to put the packaging in with the appropriate waste.
2. REMOVING THE SUPPORTS & BASE/PLATFORM
Micro Master parts are printed using a Photopolymer resin that solidifies upon exposure to UV light. We put the parts in a UV oven to cure/harden, then leave them in the ozone-layer-free New Zealand sun for several hours (probably the only advantage of having very little ozone layer!). This ensures your model parts are fully cured upon arrival. The parts will then need some simple preparation to get them ready for use.
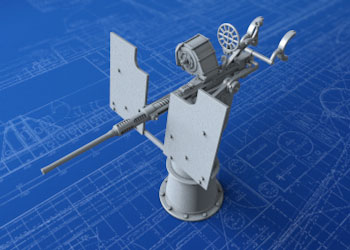
Firstly, the object supports must be removed, these are here to ‘support’ the object as it’s being printed. The advantage of Micro Master parts is that the all of the surface is smooth and have the detail you've come to expect from Micro Master parts.

The physical supports and platform will need removing from the part(s) before use, this is easily done. All you need are a good pair of fine modelling tweezers, a scalpel with a good sharp blade, a good pair of modelling snips/cutters and either hawk-like eyesight or a pair of magnifying glasses (a cup of tea is optional). It’s best to use the cutters to remove the large base or platform with the Micro Master logo on first. This makes it easier to remove the supports one by one. Start by using the tweezers to pull away the smaller supports as these will come away without cutting. Most of the supports may come away by simply ‘wiggling’ with a pair of modelling tweezers, for those that don’t, then use the scalpel to cut away the support. If the support is really thick then use the snips/cutters. In most cases no sanding will be required. Another good tip is to place the parts in the fridge for half an hour before removing the supports. This makes the resin stiffer and makes breaking the supports away easier... just don't forget your parts are in the refrigerator... we don't want them ending up in your cheese sandwich!
HINT: Very small parts can in most cases be simply eased/snapped gently away from the supports. The modeller can also use the product renders on our website as reference to see which bits of the model are supports, as in some cases it's not always obvious.
HINT: Put the parts in a fridge for an hour or so to stiffen the plastic, the supports will then snap/break off more easily.
3. PAINTING
Because the parts have been washed in IPA (not beer, but isopropyl alcohol) and then fully cured, the only preparation that may be required before painting is to wash in luke-warm water with a small amount of dish-wash liquid. Parts must then be left to dry off before painting. All types of paint can be used, but test a small area first just to make sure! Try not to slap too thick-a-coat on as this will obscure all that beautiful surface detail, a few thinner coats is better than one thick one. We recommend acrylics as they tend to be thinner, however enamels can also be used, just make sure you thin the paint down a bit.
HINT: Don’t use IPA to clean these at it may cause a breakdown or weaken the resin.
4. CEMENTING
The resin is unlike the polystyrene plastic used in model kits, so modellers are advised to use a good Cyanoacrylate type glue, either in gel form or liquid form depending on the modellers preference.
We hope you like your Micro Master parts as we go above and beyond with our research and production to make sure that our parts and accessories are the best available... anywhere.
Happy modelling!
